
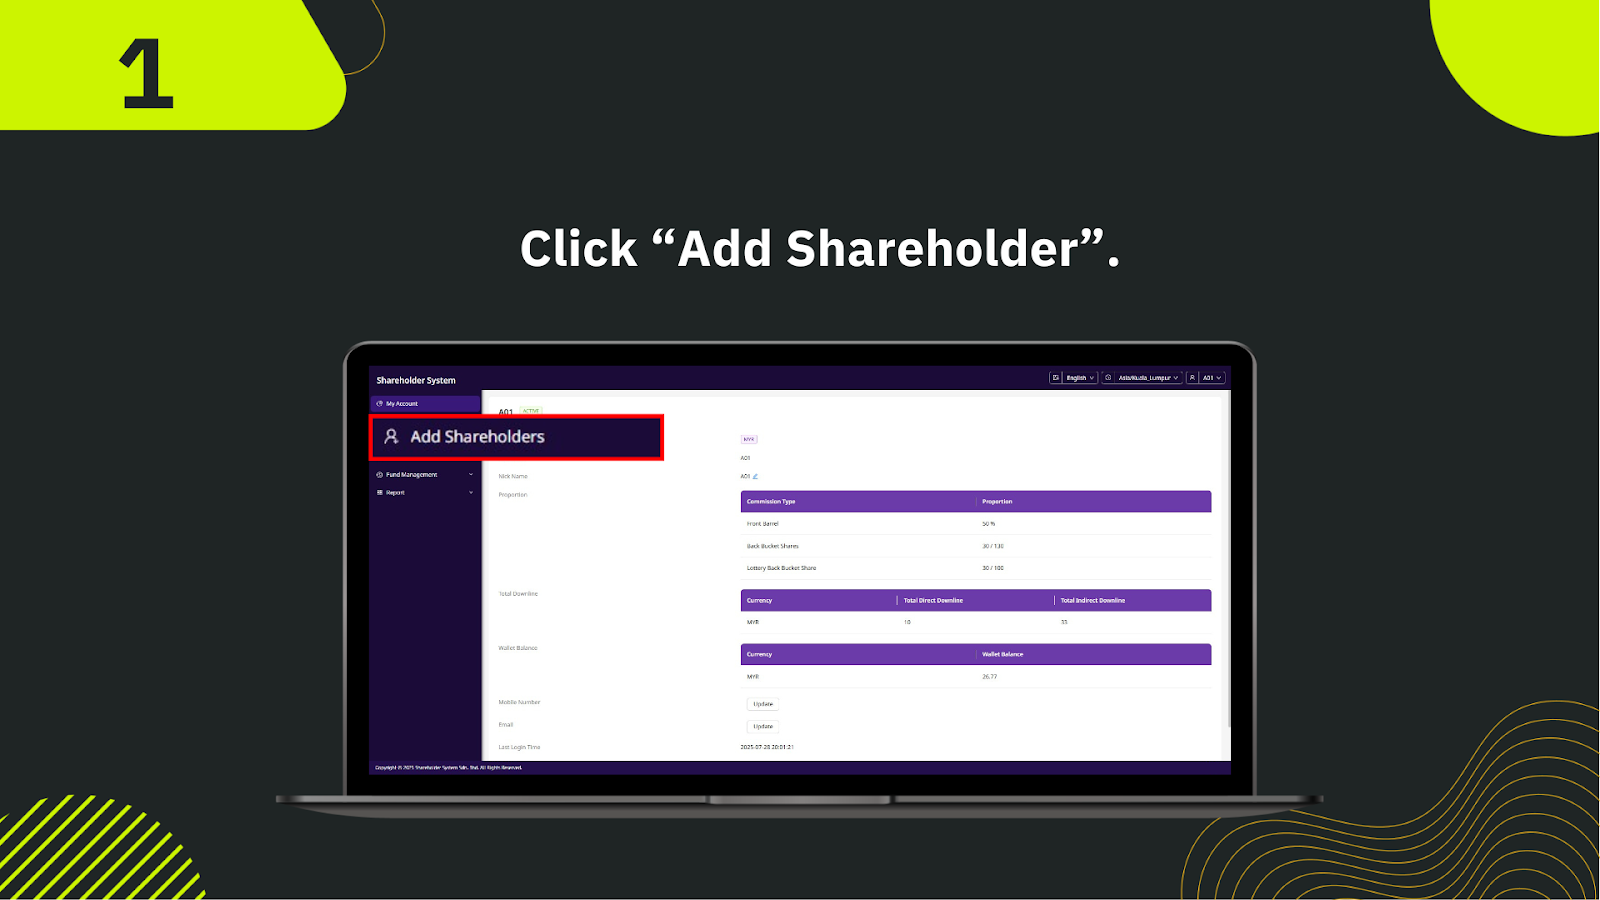


From the left menu in the shareholder system, click "Add Shareholders" to start the downline creation process.
Fill in the shareholder’s full legal name in the "Full Name" field. This will be used for official identification in the system.
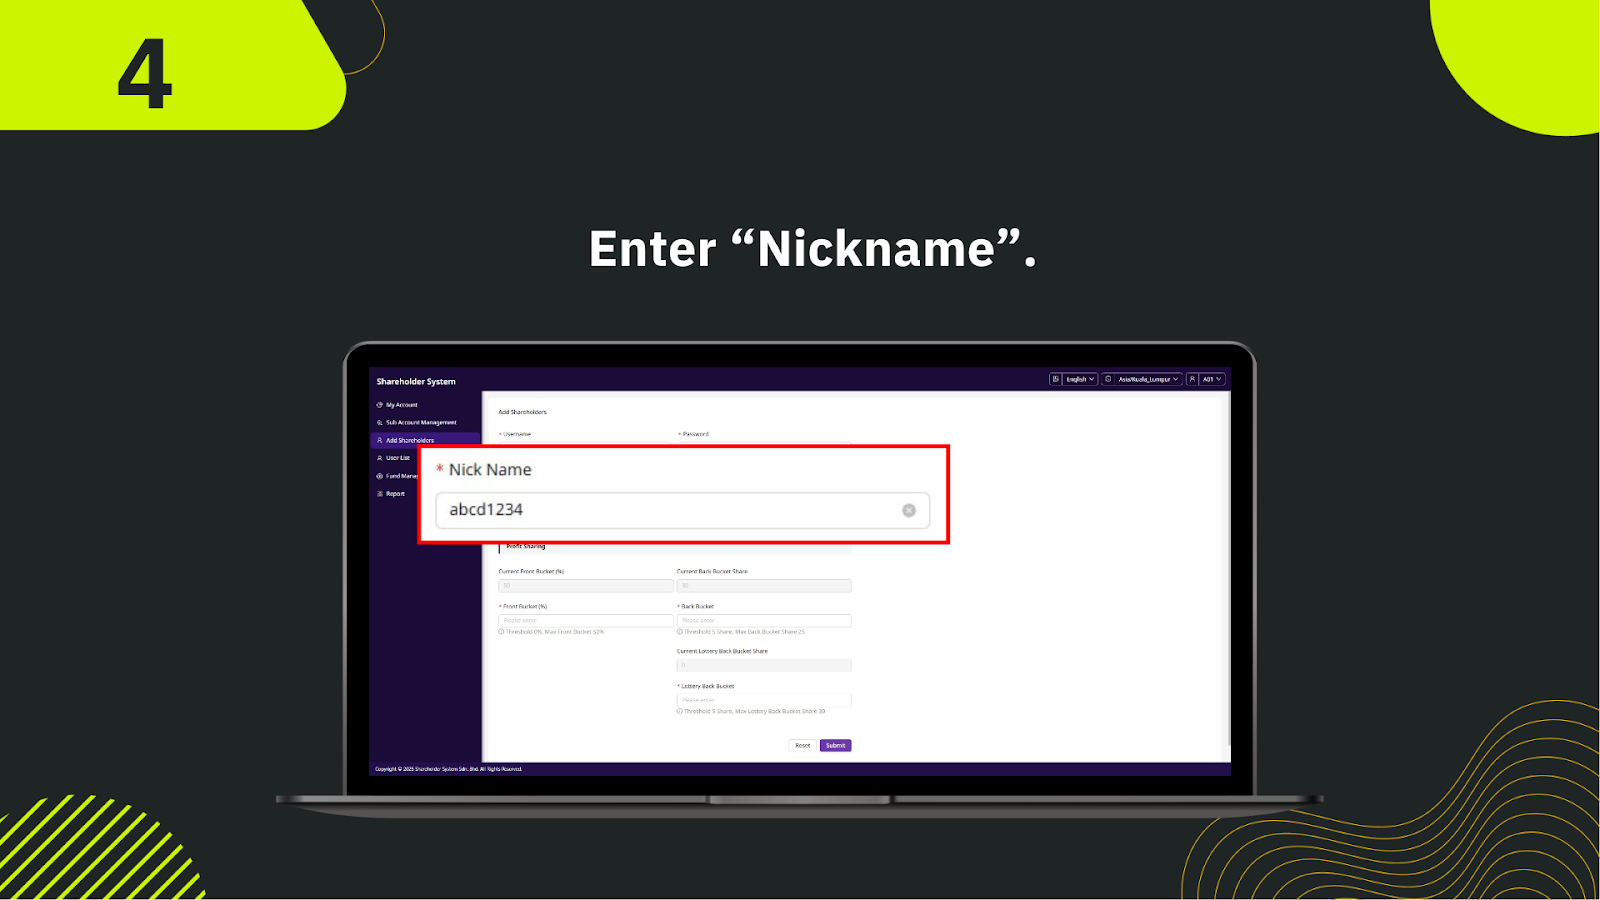
Provide a nickname in the "Nick Name" field for easier reference in reports and internal listings.
Input the shareholder’s valid mobile number to enable contact and verification.
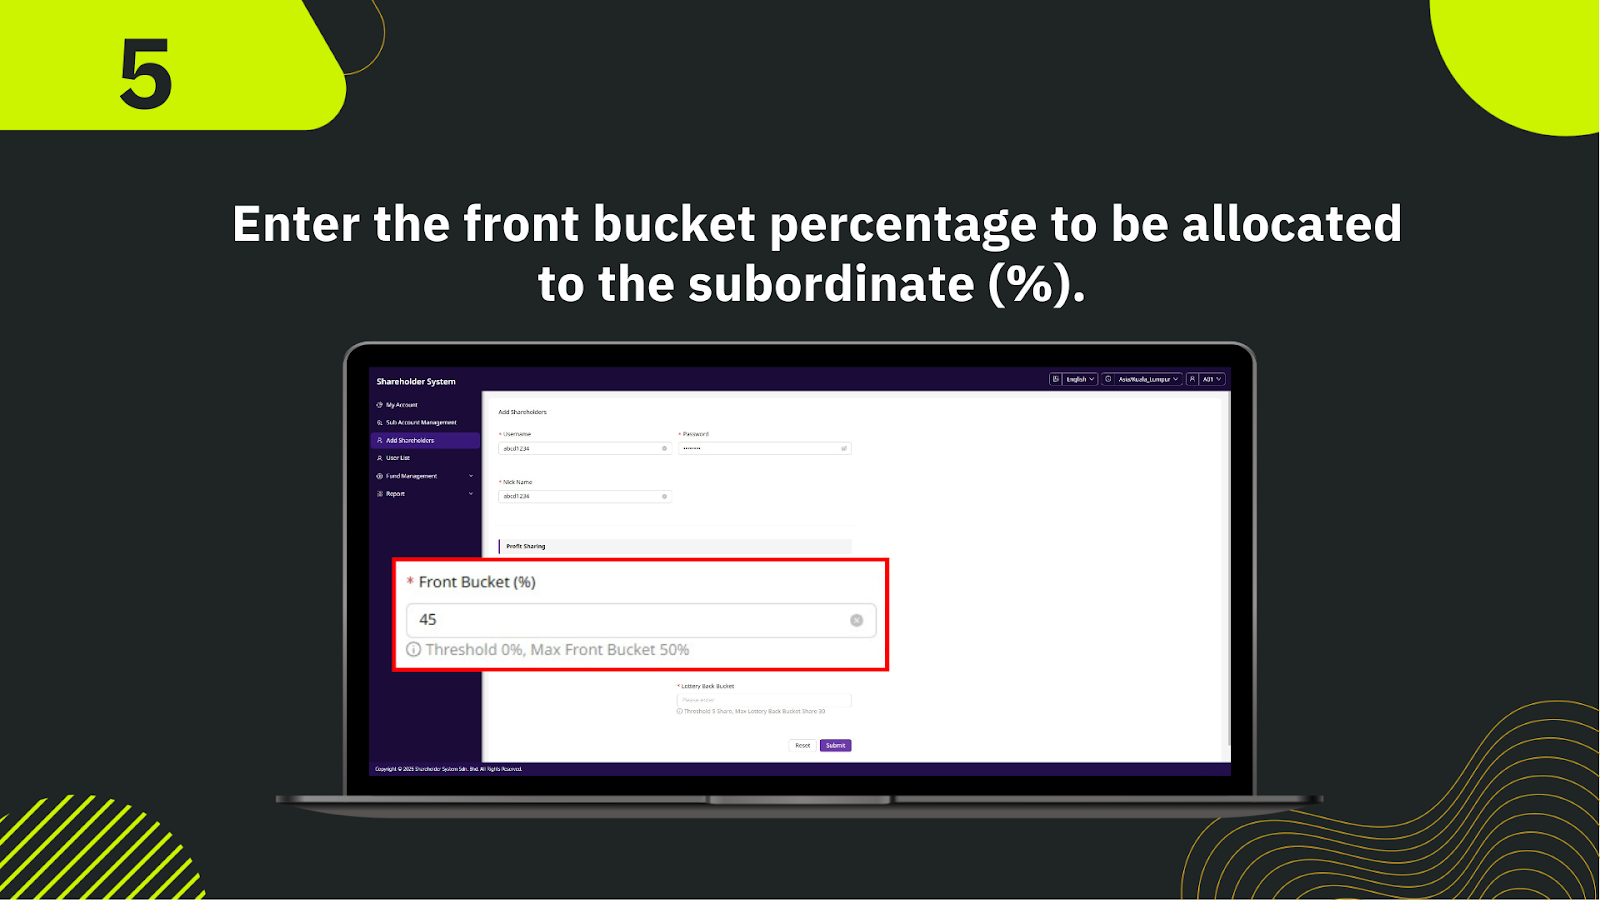
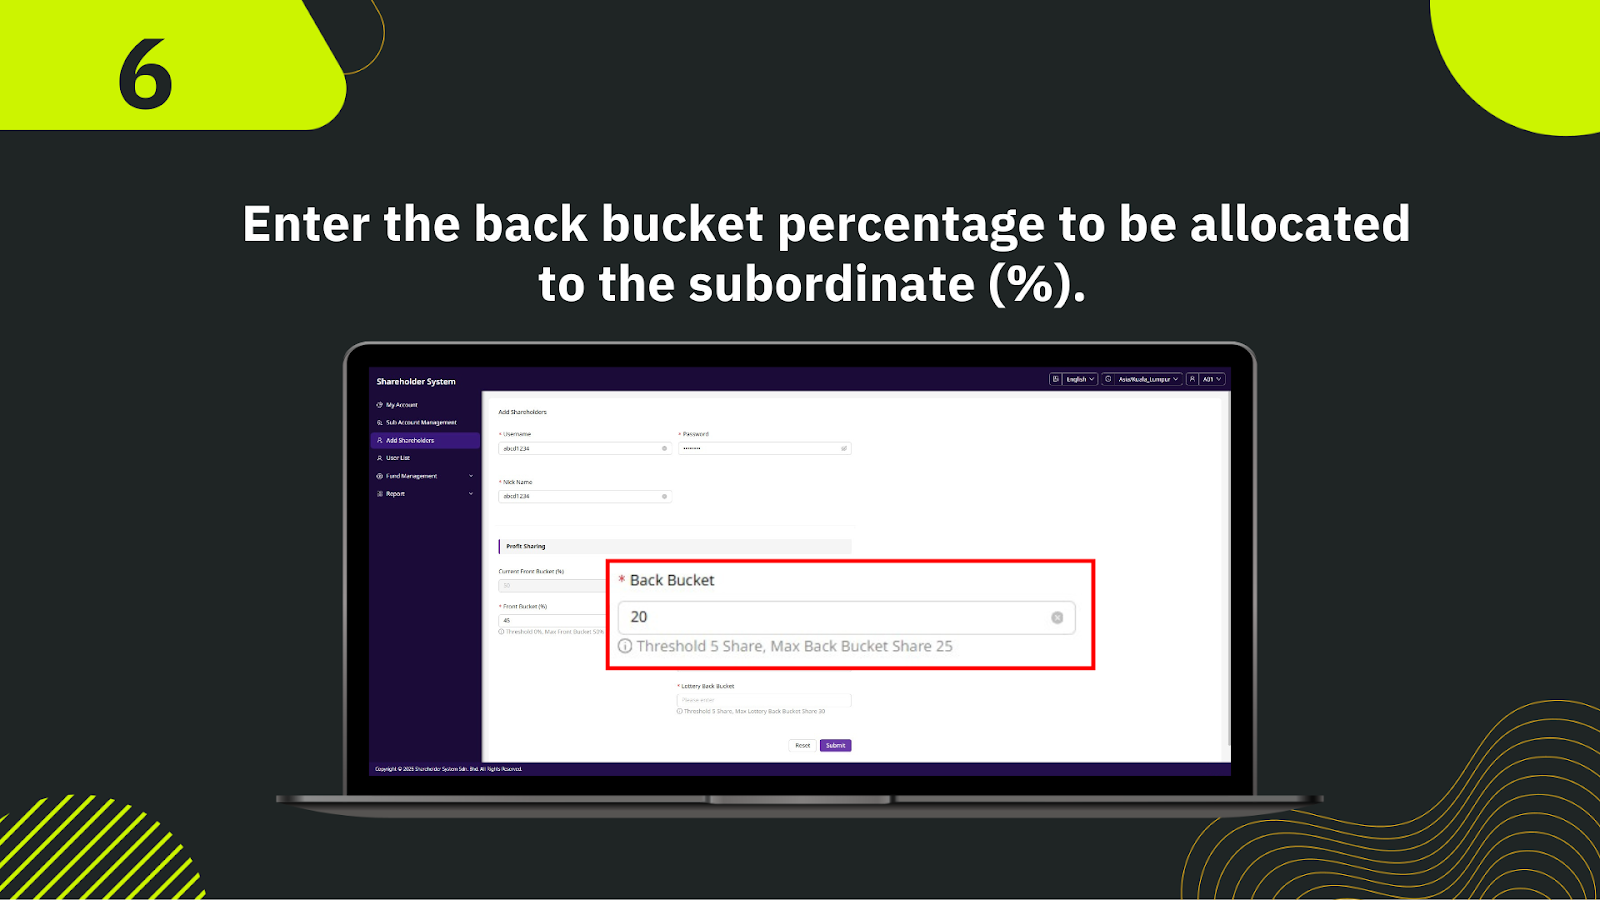
Select commission types such as Front Barrel, Back Bucket Shares, or Lottery Back Bucket Share. Assign the correct proportion for each.
If applicable, allocate an initial wallet balance for the shareholder’s account.
Choose the account status as "Active" or "Inactive" based on shareholder activation requirements.
Once all details are filled out correctly, click "Submit" to complete the creation of the new downline.


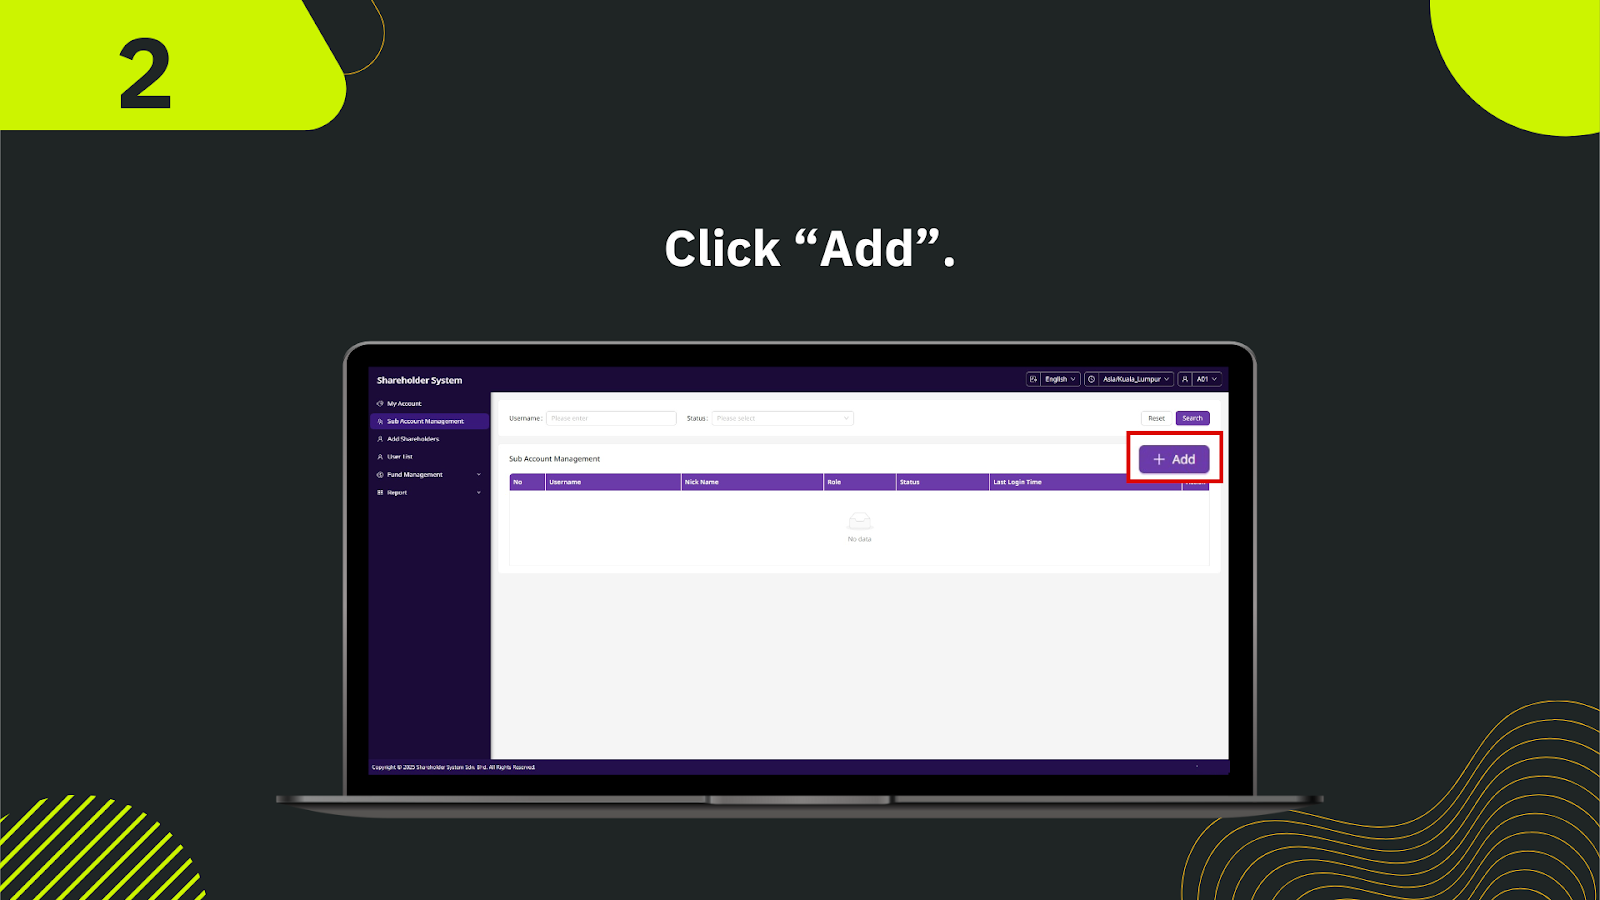

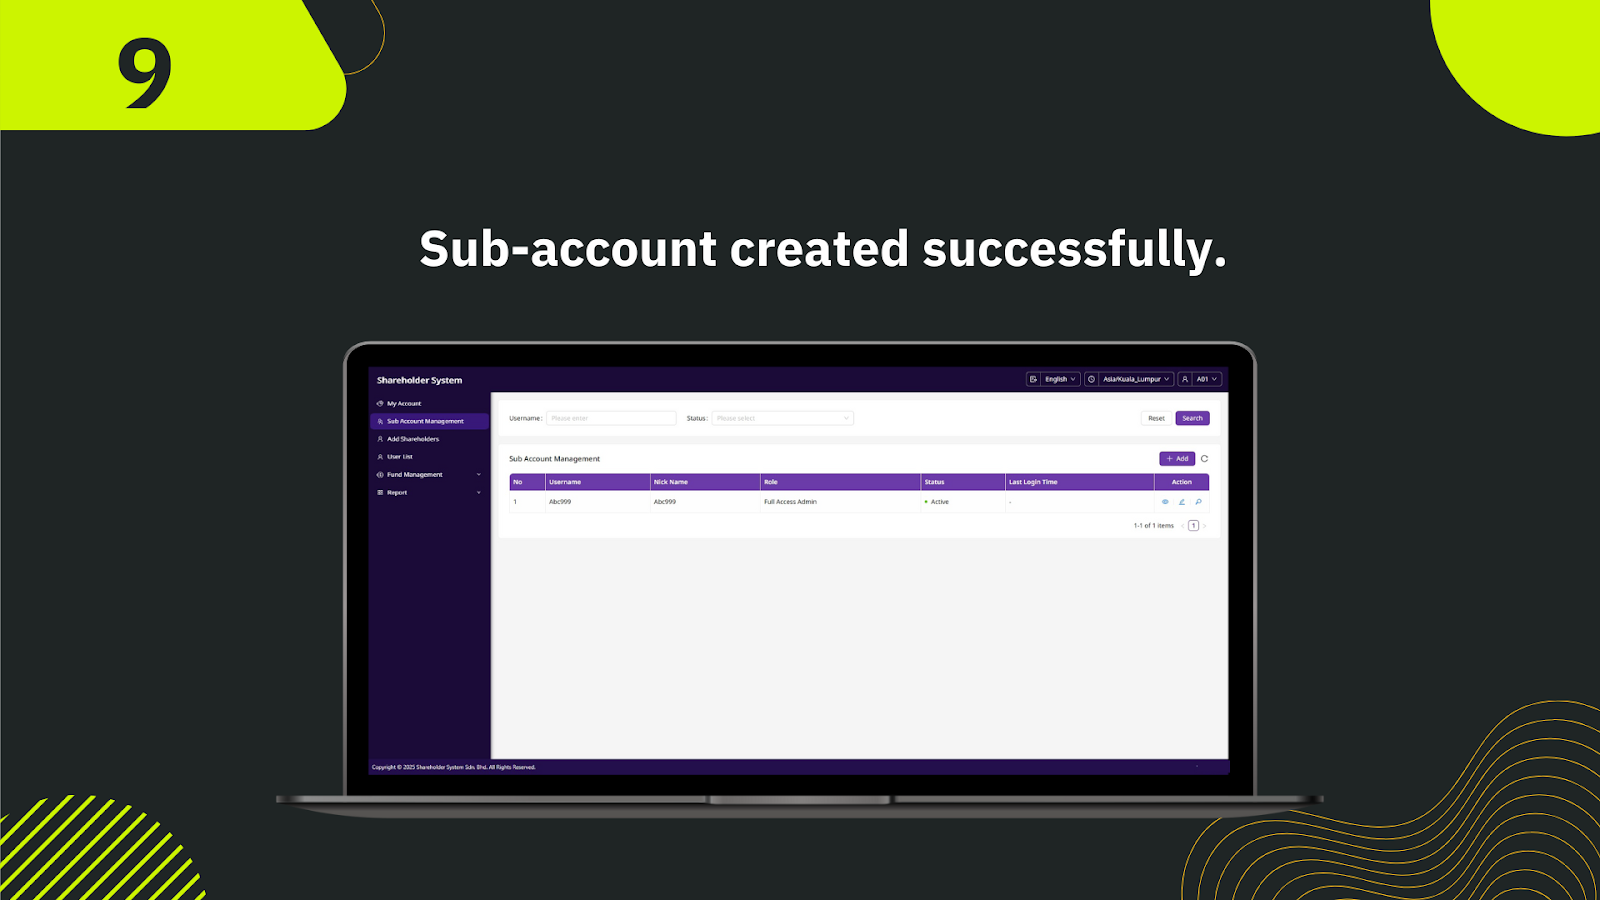
In the shareholder system, navigate to the left-hand menu and click "Sub Account Management" to open the sub-account dashboard.
On the Sub Account Management page, click the "Add" button to start creating a new sub-account.
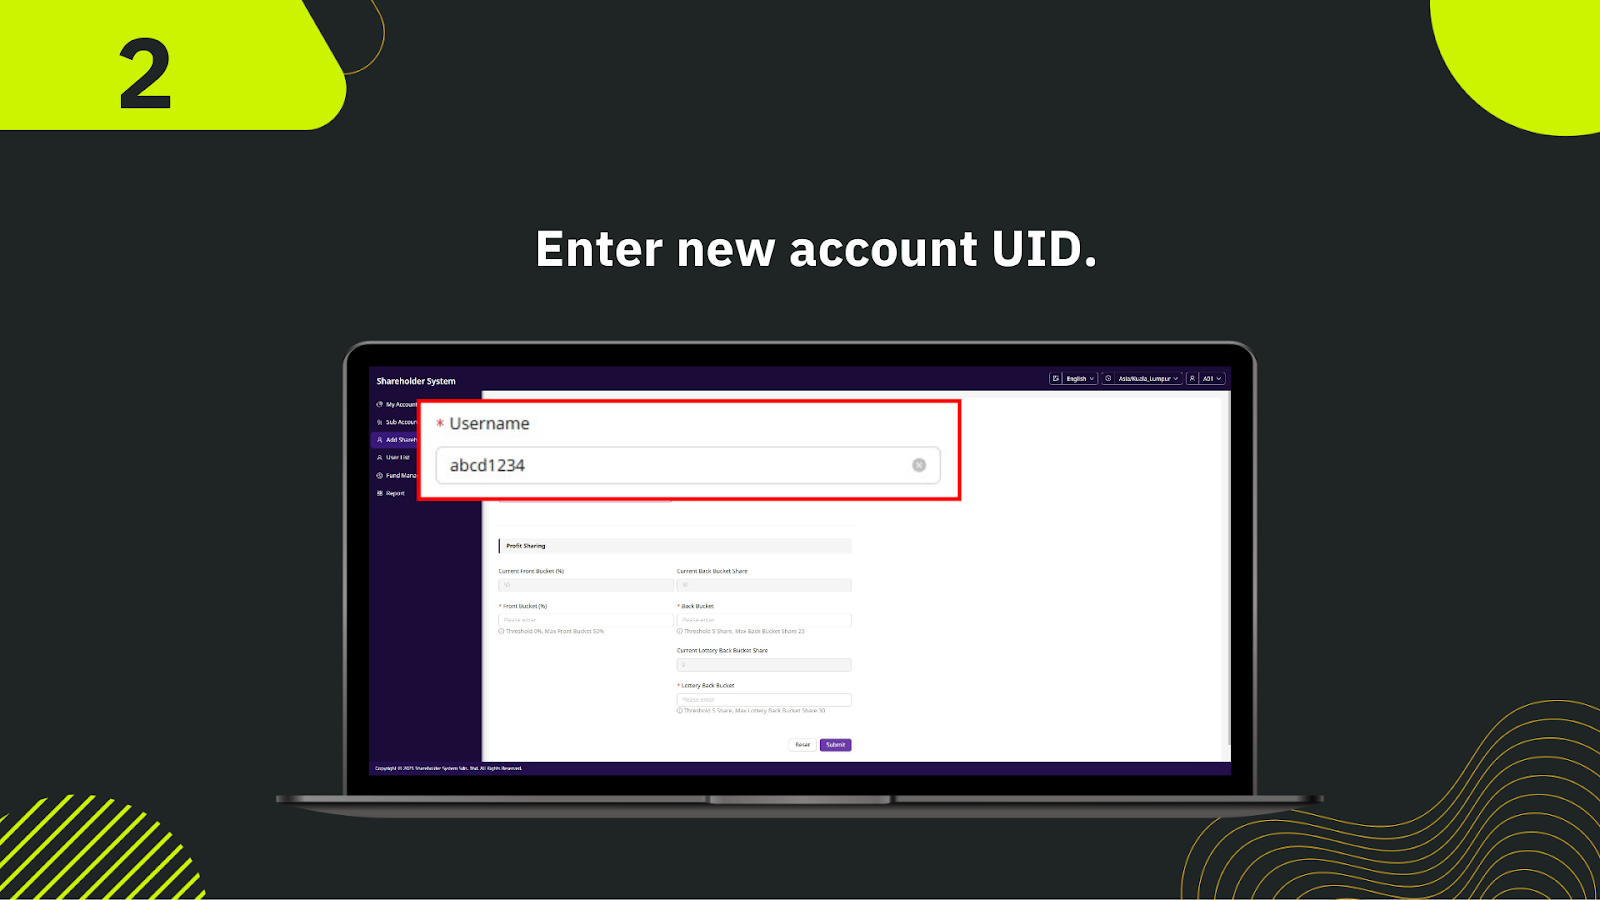
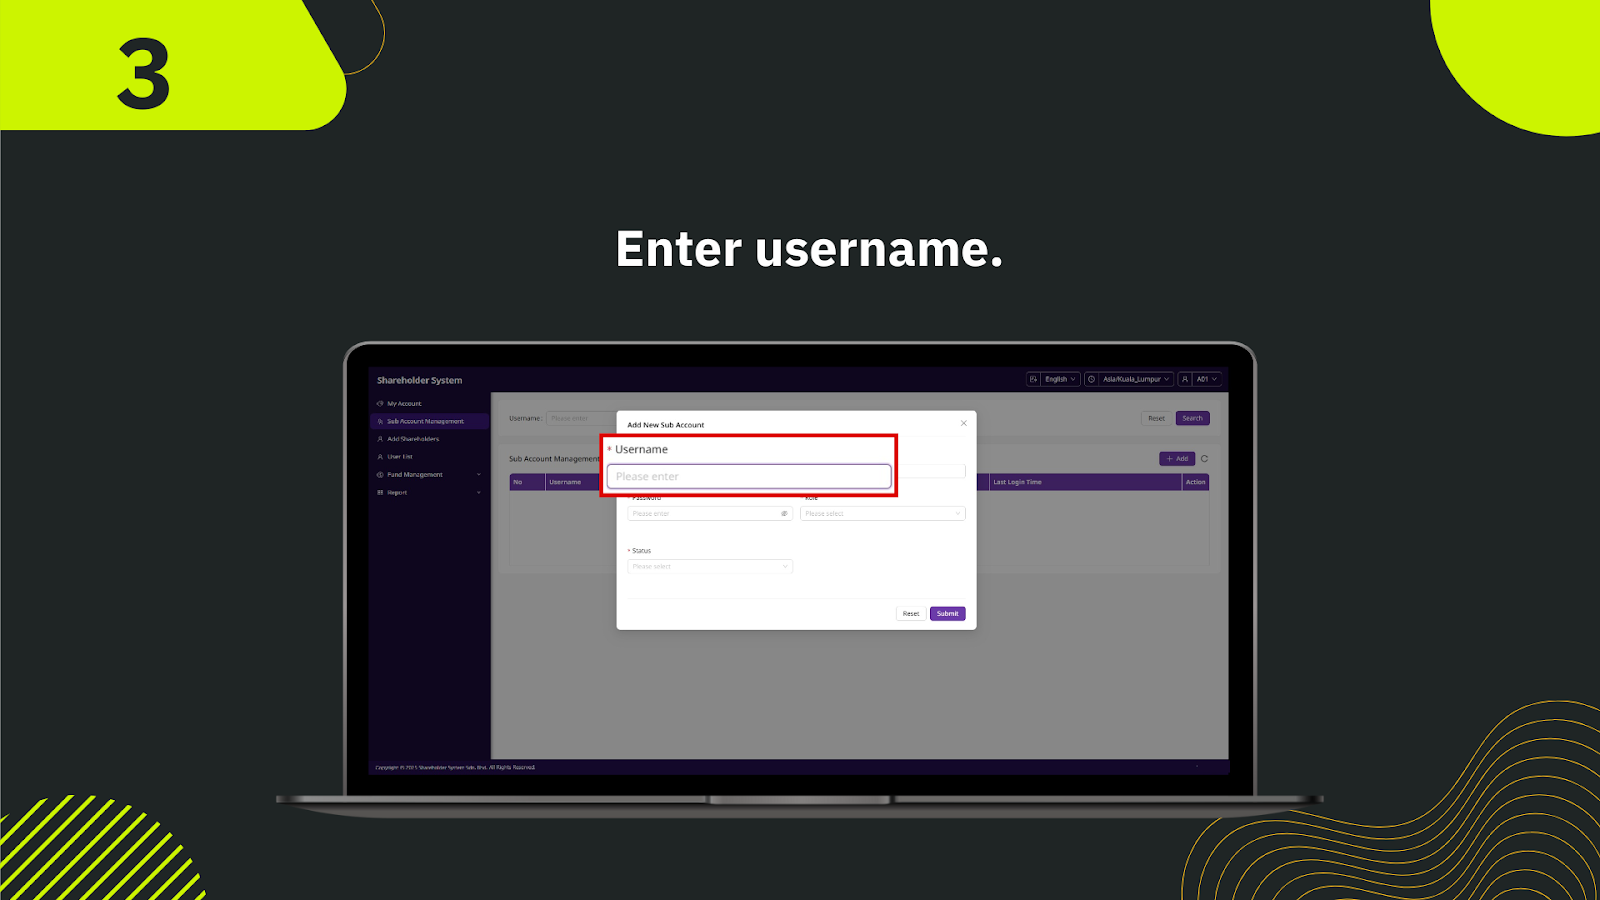
In the pop-up form, enter the desired username for the new sub-account. This will be used for login purposes.
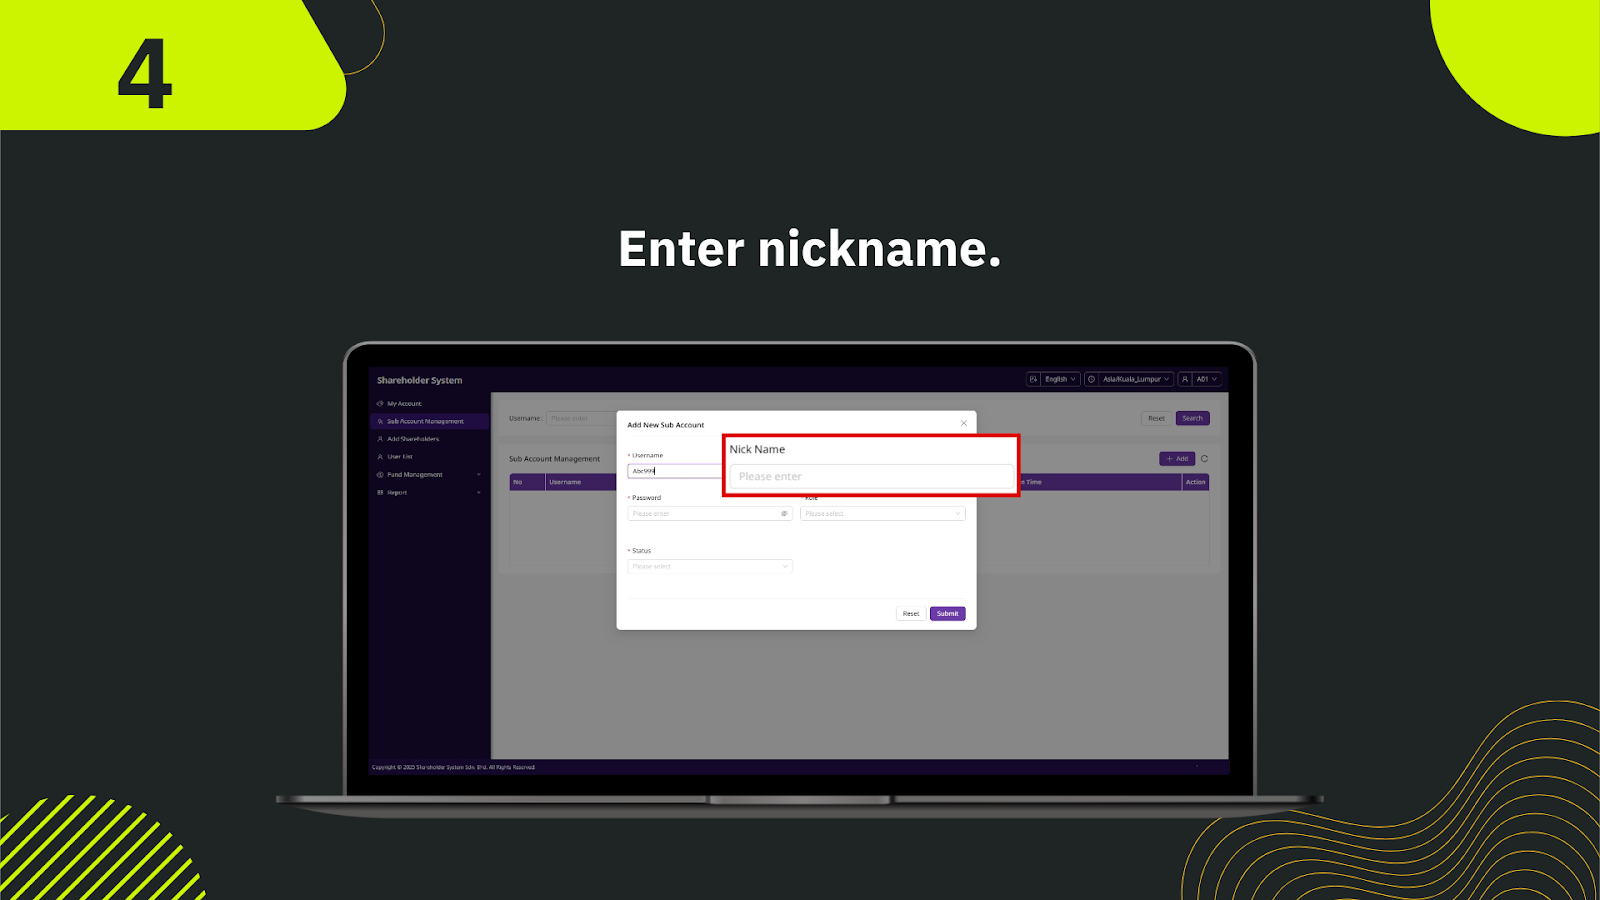
Fill in the "Nick Name" field with a display name for the sub-account. This name will be shown in the system’s user list.
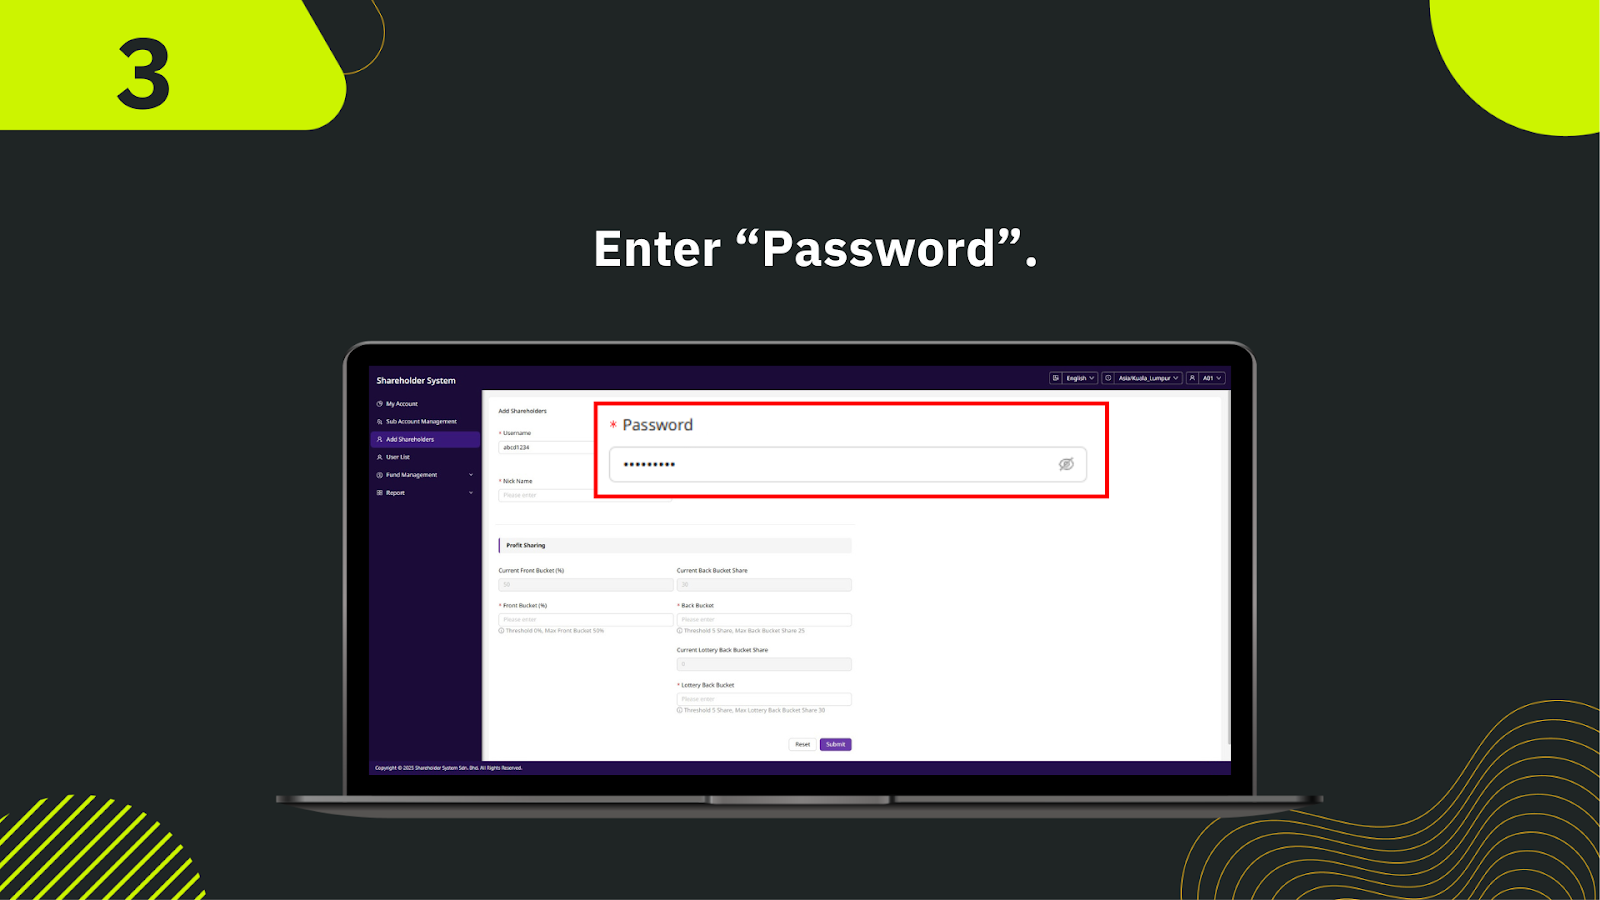
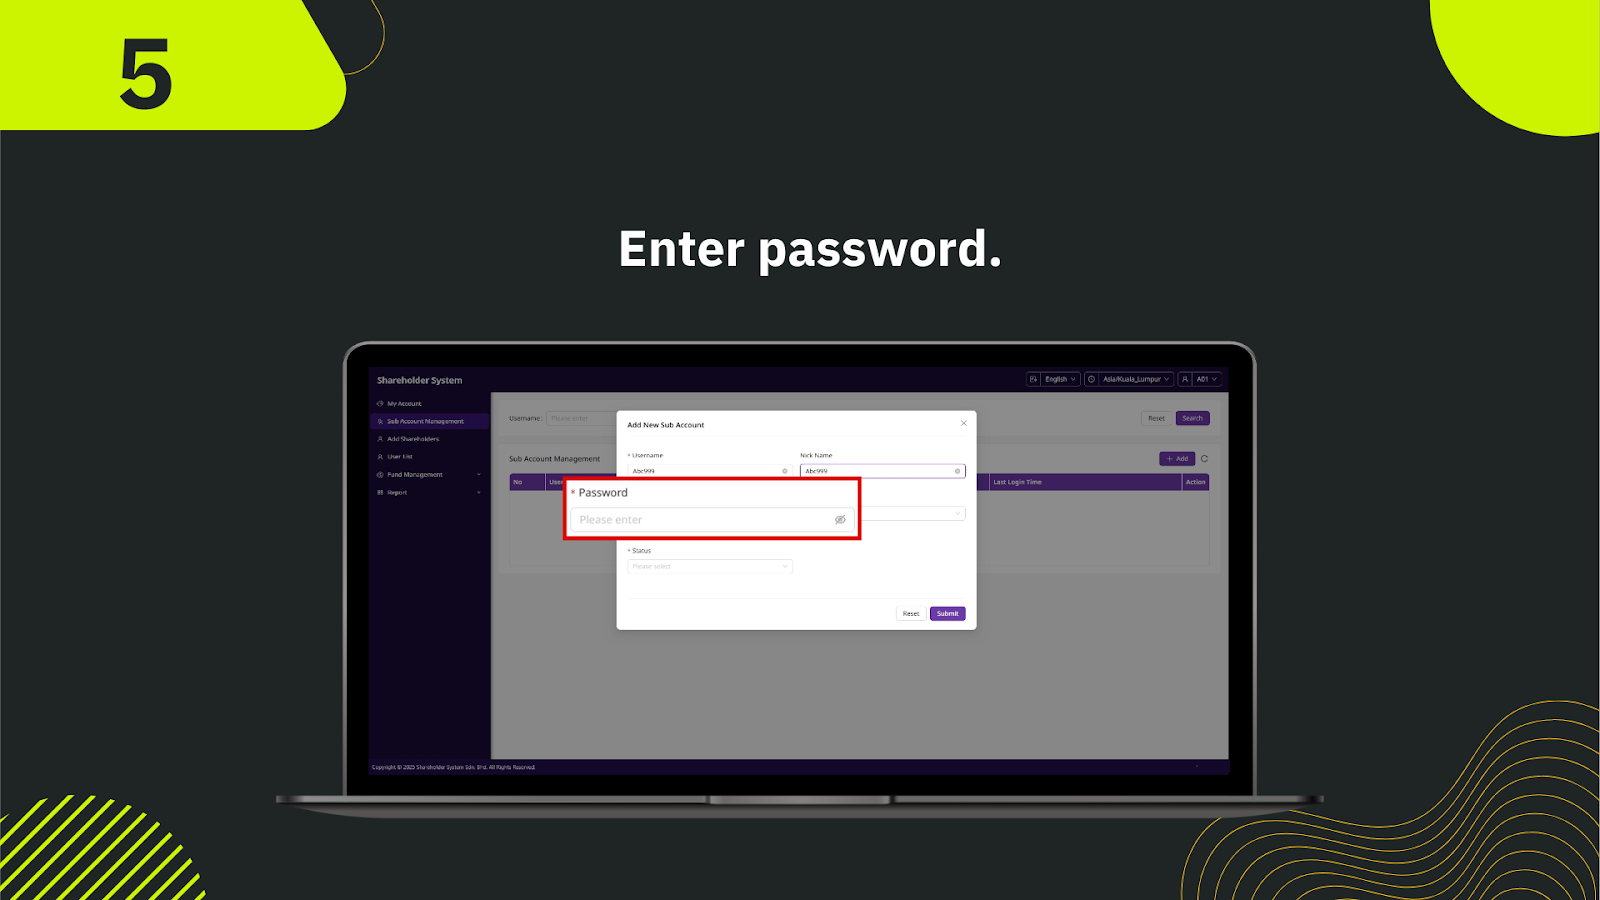
Input a secure password for the sub-account. Ensure it meets system security requirements.
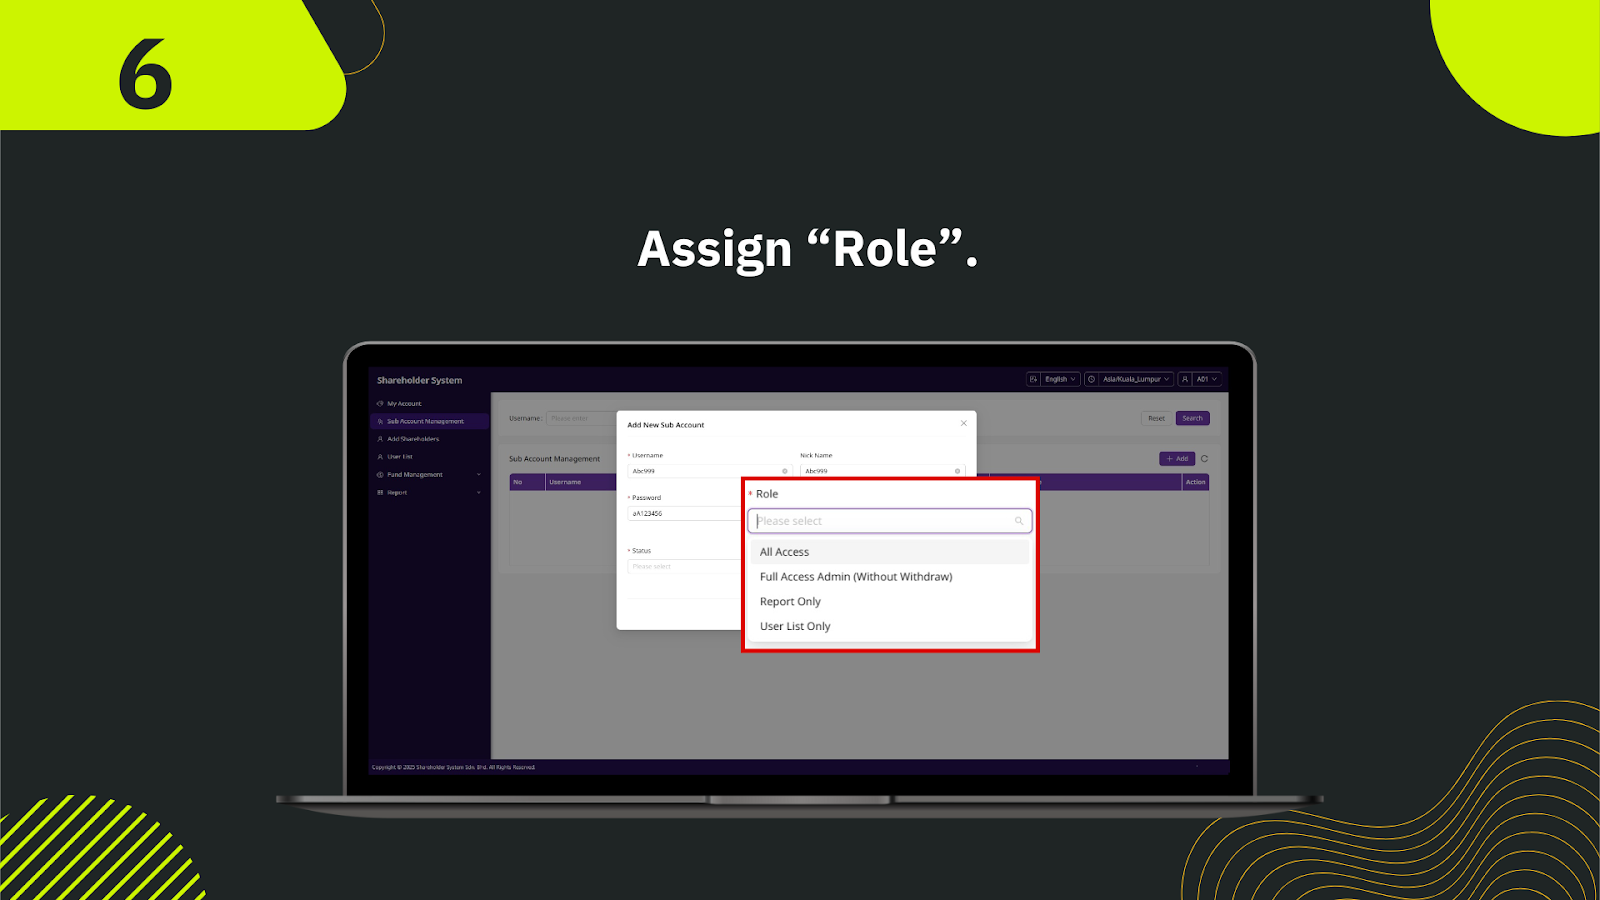
Choose the appropriate role from the dropdown menu, such as "All Access," "Full Access Admin (Without Withdraw)," "Report Only," or "User List Only."
Select the status of the sub-account, e.g., "Active" or "Inactive."
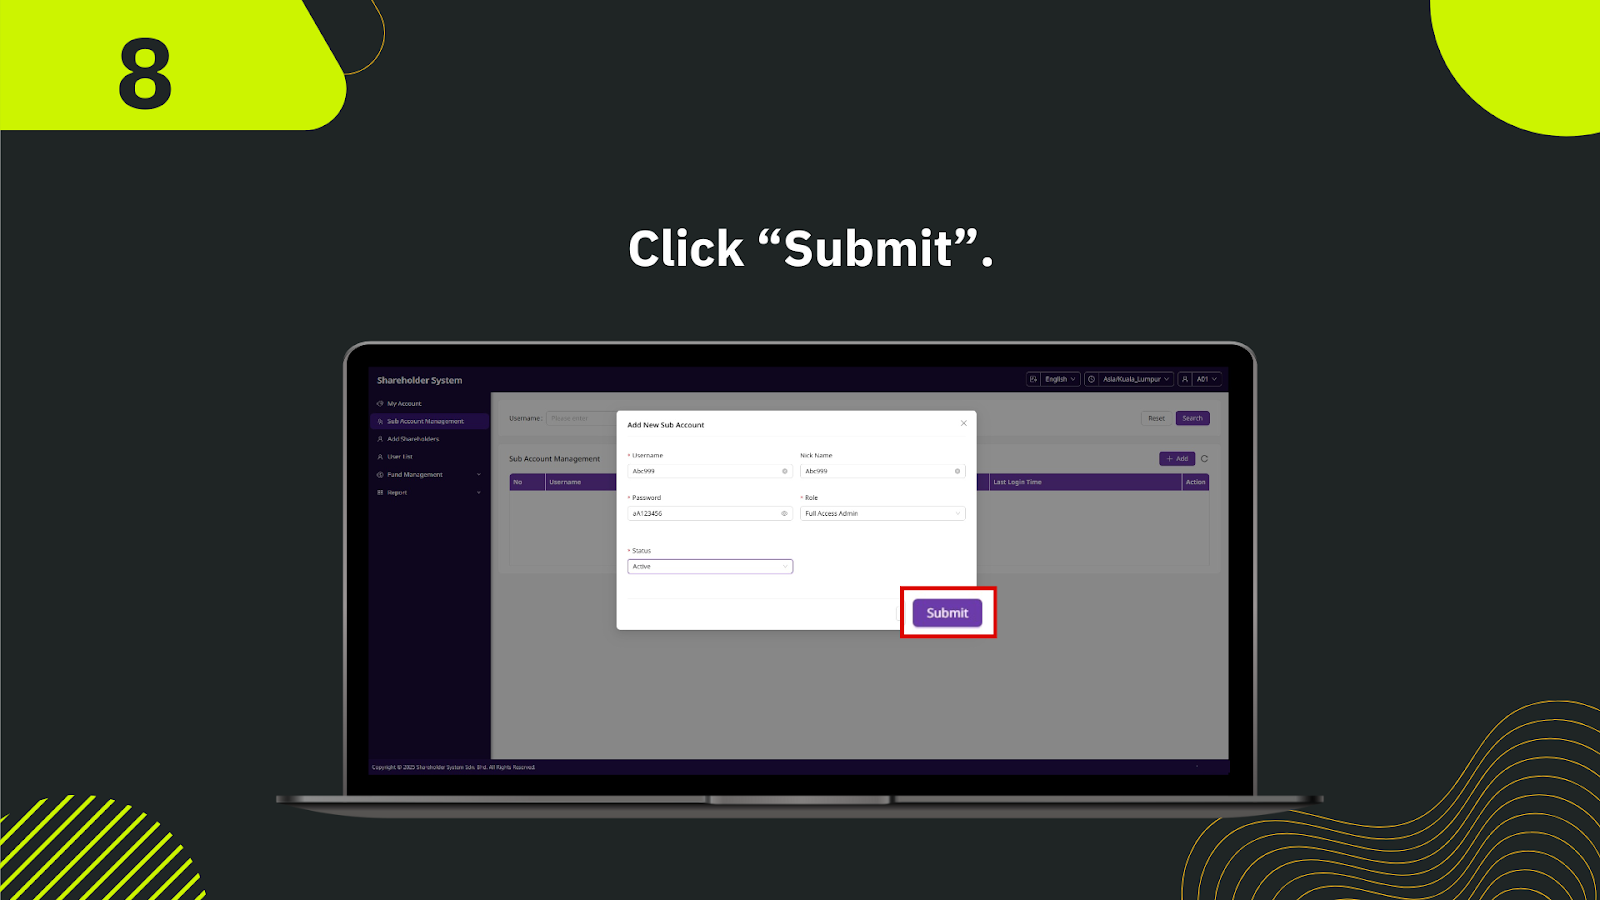
After filling in all required fields, click the "Submit" button to save the new sub-account.
Once submitted, the system will display the new sub-account in the list with its details, confirming creation.
Log in to the shareholder system today to create downlines and sub-accounts with ease. Optimize your operations and manage your network efficiently.
Log In to Shareholder System